GEOTREK in JAMAICA
How I installed a web plateform to manage and promote Jamaican treks with open source tools
(QGIS, OpenStreetMap, PostgreSQL, Ubuntu, Geotrek)
Camille Monchicourt / Ecrins national Park / February 15th 2018
A. INTRODUCTION
In this article, I will explain how I installed open source web application Geotrek with a few open source tools and some open data.
I will start with downloading data from OpenStreetMap and formating them with QGIS.
Then I will install an Ubuntu server and install Geotrek-admin and Geotrek-rando on it.
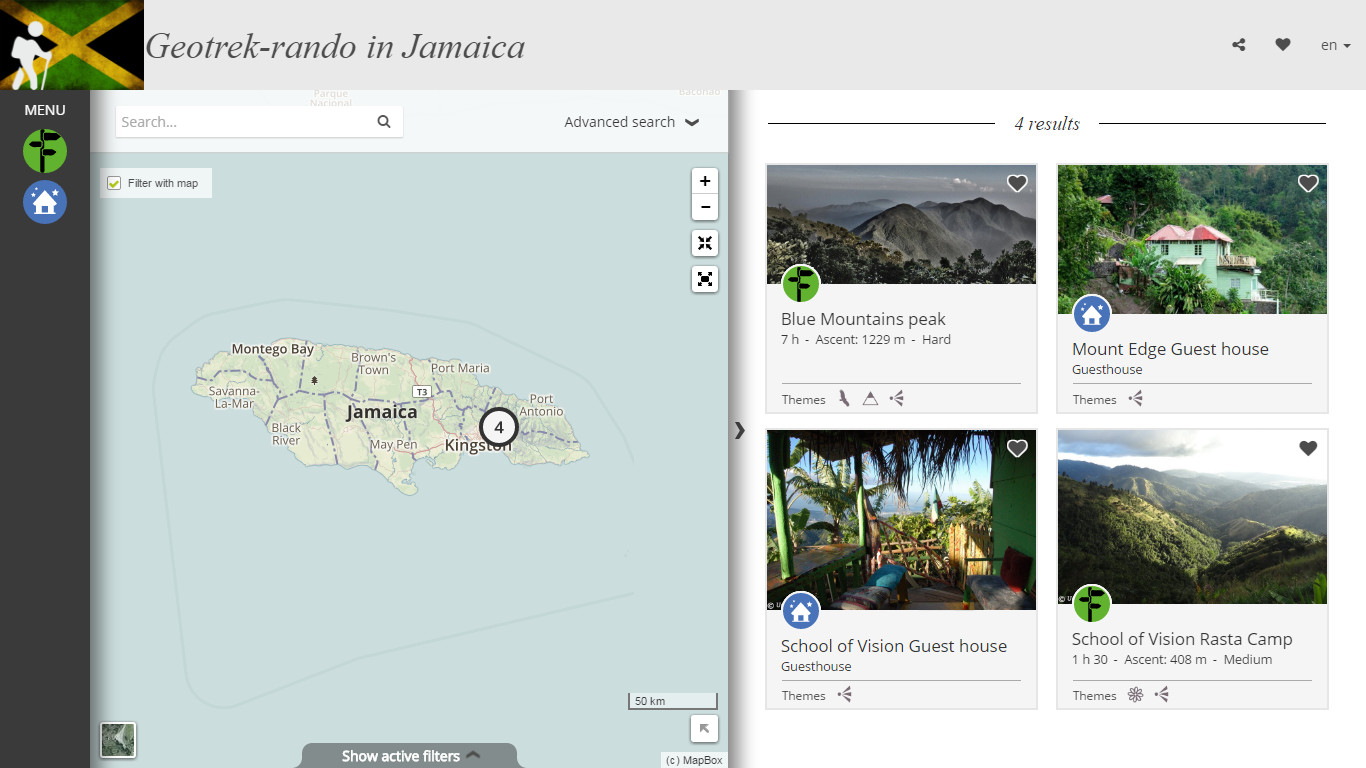
I will also import and create a few sample data in order to have a dataset on the Geotrek-rando portal hike-jamaica.com.
Geotrek is an open source web and mobile application to manage and promote treks and their points of interest : http://geotrek.fr.
In this article, I installed Geotrek-admin 2.17.2 and Geotrek-rando 2.14.10 but look out for regular new versions that may can change a few things from this article.
Official and updated documentation is available at https://geotrek.readthedocs.io.
B. DATA
1. Download DEM for Jamaica
I downloaded the SRTM Digital Terrain Model (DEM) from Jamaica on http://srtm.csi.cgiar.org/SELECTION/inputCoord.asp.
It will be used to calculate altimetric information automatically inside the database.
2. Download Jamaican boundaries
I downloaded Jamaican boundaries and parish on http://www.gadm.org.
I could also get them from https://mapzen.com/data/borders/.
I could also find Jamaican national parks list on http://www.nationalparks-worldwide.info/jamaica.htm.
I could also have used OpenStreetMap data directly in QGIS, with QuickOSM plugin (see below).
DOWNLOAD and INSTALL QGIS that we'll use to download some spatial data and import it into Geotrek database.
Notes:
- OpenStreetMap (OSM) is a collaborative project to create a free editable map of the world. The creation and growth of OSM has been motivated by restrictions on use or availability of map information across much of the world. OSM is considered a prominent example of volunteered geographic information.
- QGIS is an open source GIS software that is now a reference worldwide.
It allows to open, edit, create and analyse spatial data from several formats (shapefiles, GPX, KML, Geojson...).
It also allows to display basemaps from internet services (OpenStreetMap, BING, Mapbox, Google maps...) and to display vector files on it.
If you don’t have data, you can download some on internet, or you can directly download OpenStreetMap data to include them in Geotrek database (parish boundaries, paths, national parks...).
In our case, we used QuickOSM to download OSM data.
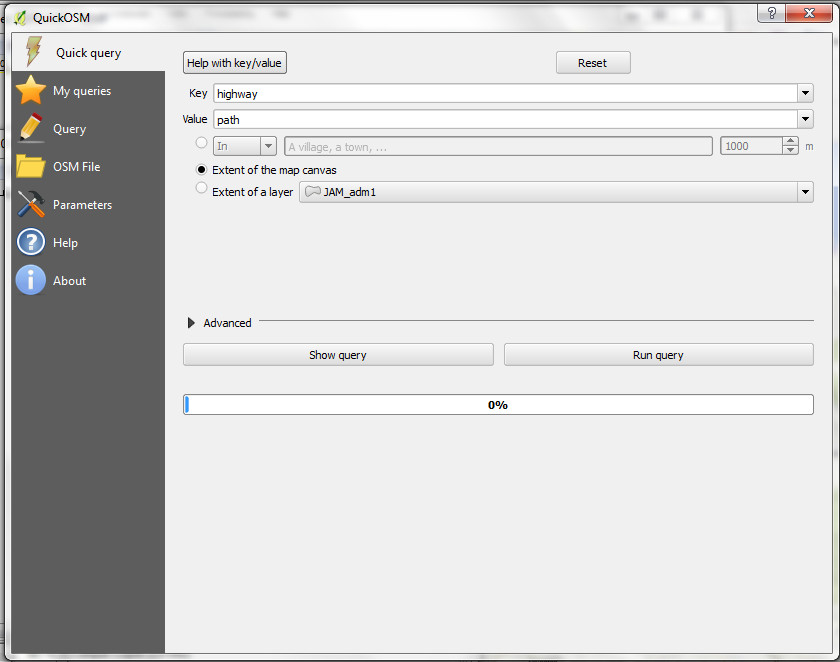
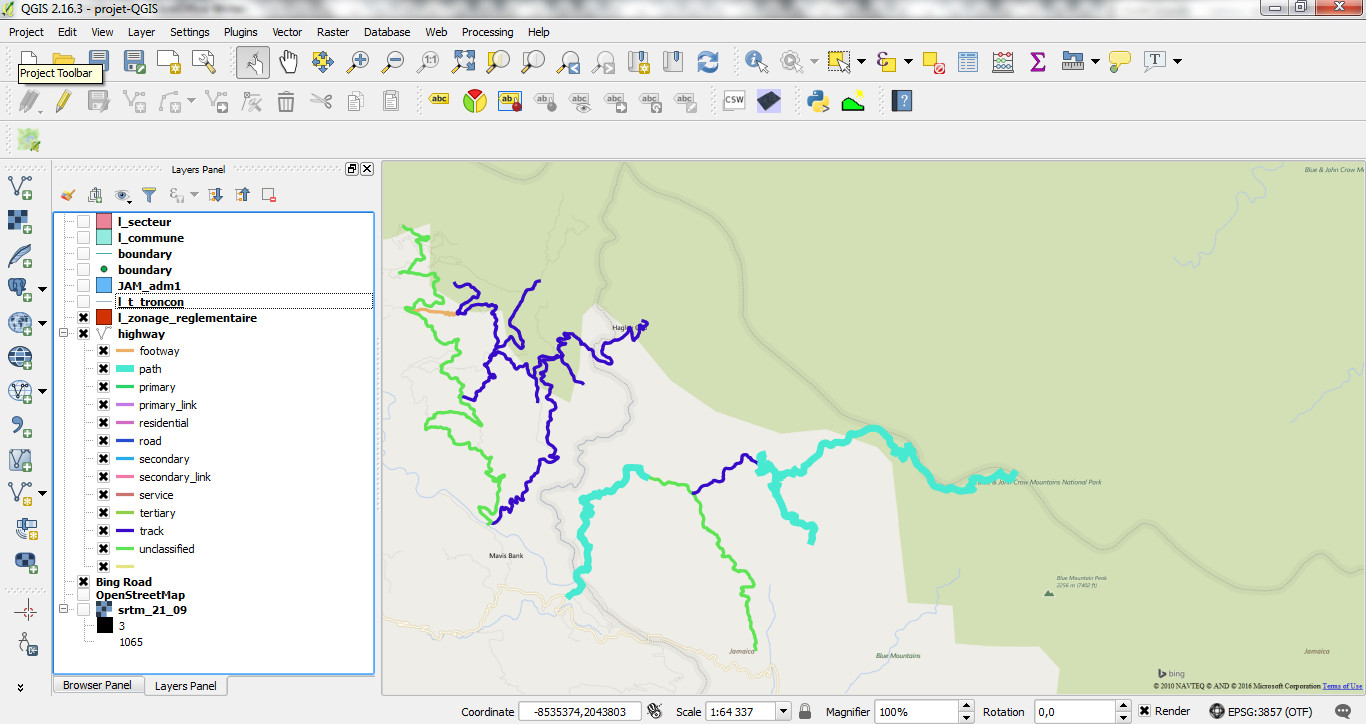
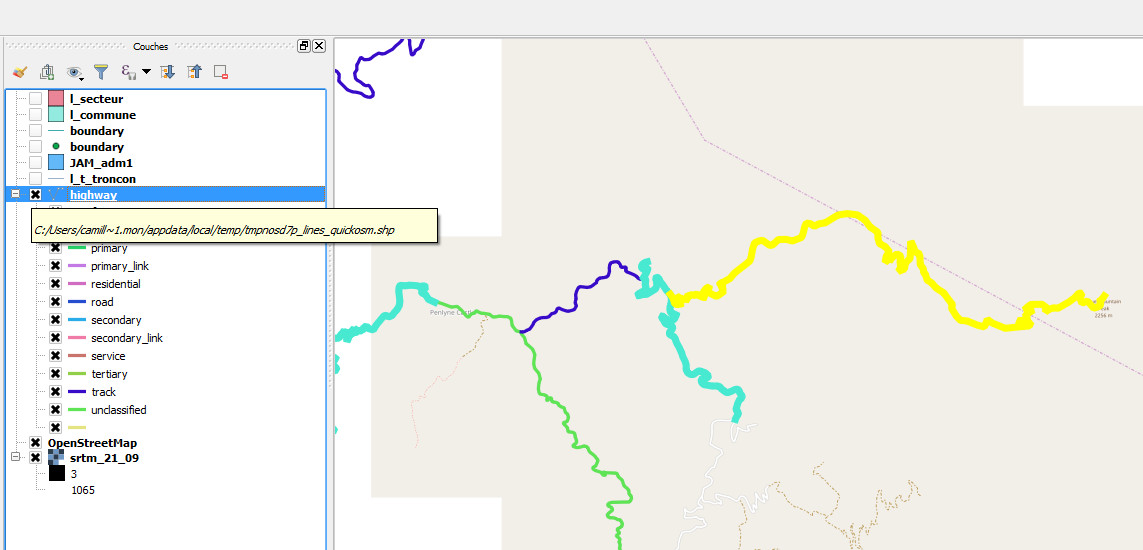
This way we could open OSM path layer into QGIS and choose a colour for each type of road (primary, footway, paths…).
Higway = path
Boundary = national_park
Boundary = administrative
Tourism = alpine_hut
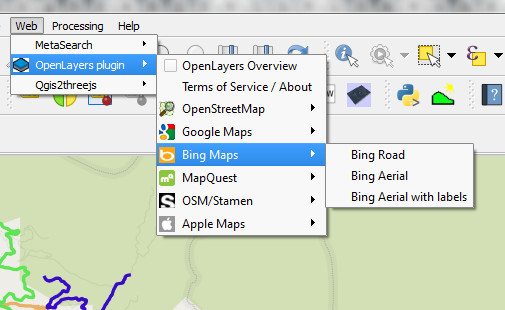
If you don’t have raster files for basemaps, you can open some from internet services directly into QGIS with WEB / OpenLayers plugin that is now included in QGIS.
It features OSM, Google Maps, Bing maps and many other basemaps.
C. SERVER
Get an host. A virtual private server can be enough for that.
You need to be able to install Ubuntu to install Geotrek-admin and you need an administrator linux user that can install the middleware (PostgreSQL, Python, NGINX...).
We choose one of these from French hosting company OVH: https://www.ovh.com/fr/vps/
We started with VPS SSD 1 (3€/month) with 1 vCore, 2.4 GHz, 2 Go RAM, SSD 10 Go.
It is enough to start but to go further, it would deserve more performances, storage capacities and additional services such as automatic backup.
Once you have an host, its IP, his root user and password, connect to it with SSH.
On Windows we used WINSCP to browse the host folders and PUTTY to execute commands on the server.

Securise your server
Change SSH port
nano /etc/ssh/sshd_config
Change SSH port in this file (22 by default)
service ssh restart
Change root password
passwd root
Install sudo
apt-get update
apt-get install -y sudo
Create an user to dont work with root
adduser myusername
If you want to add sudo rights to an existing user
sudo usermod -a -G sudo myusername
Disallow root login
nano /etc/ssh/sshd_config
PermitRootLogin no
service ssh restart
Install fail2ban
apt-get update
apt-get install fail2ban
You should also set a firewall and a backup system.
D. GEOTREK-ADMIN
I will now install Geotrek-admin 2.17.2, which includes the database and web application to administrate Geotrek data.
The official updated documentation is available at https://geotrek.readthedocs.io.
Log in with your linux user (not root)
cd /home/myusername
wget https://github.com/GeotrekCE/Geotrek-admin/archive/2.17.2.zip (X.Y.Z to replace with the latest stable version number)
sudo apt-get install unzip
unzip 2.17.2.zip
cd Geotrek-admin-2.17.2/
./install.sh
Fullfil the settings.ini file (automatically opened during installation process) with your configuration.
In our case, we changed these settings:
defaultstructure = Geotrek-Jamaica
language = en
languages = en,fr
srid = 3857
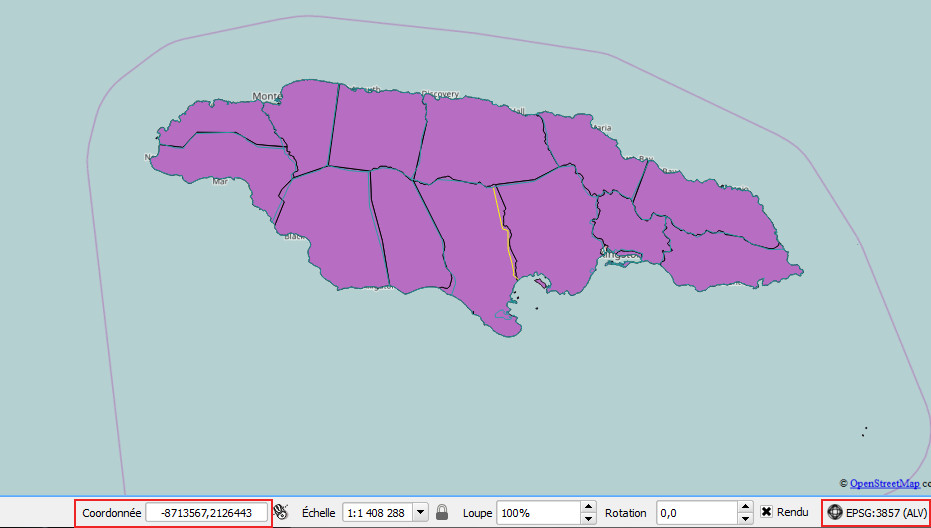
spatial_extent = -8760000,1980000,-8430000,2130000
To get coordinates, we used QGIS, set the project in the projection used in Geotrek (3857) and got the 4 coordinates with moving the mouse over the map and checking the coordinates values at the bottom of the map.
Note: In this example we used the WGS84 / Pseudo Mercator projection (3857) but it is not a good one to use as it is not a recognized geodetic system and gives wrong values for distances (http://spatialreference.org/ref/sr-org/epsg3857/).
Rather use a local projection such as 2154 in France, 3035 in Europe.
See http://spatialreference.org and http://epsg.io for details about projections.
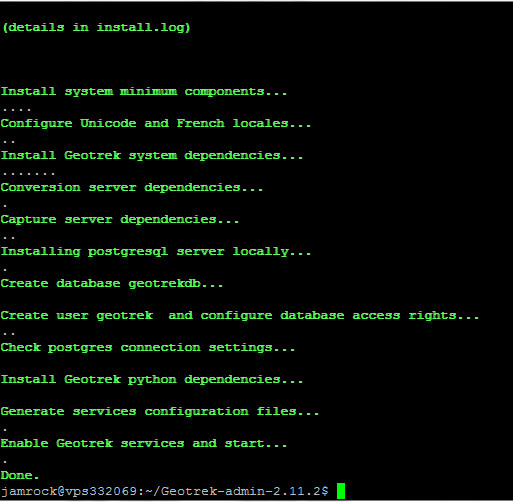
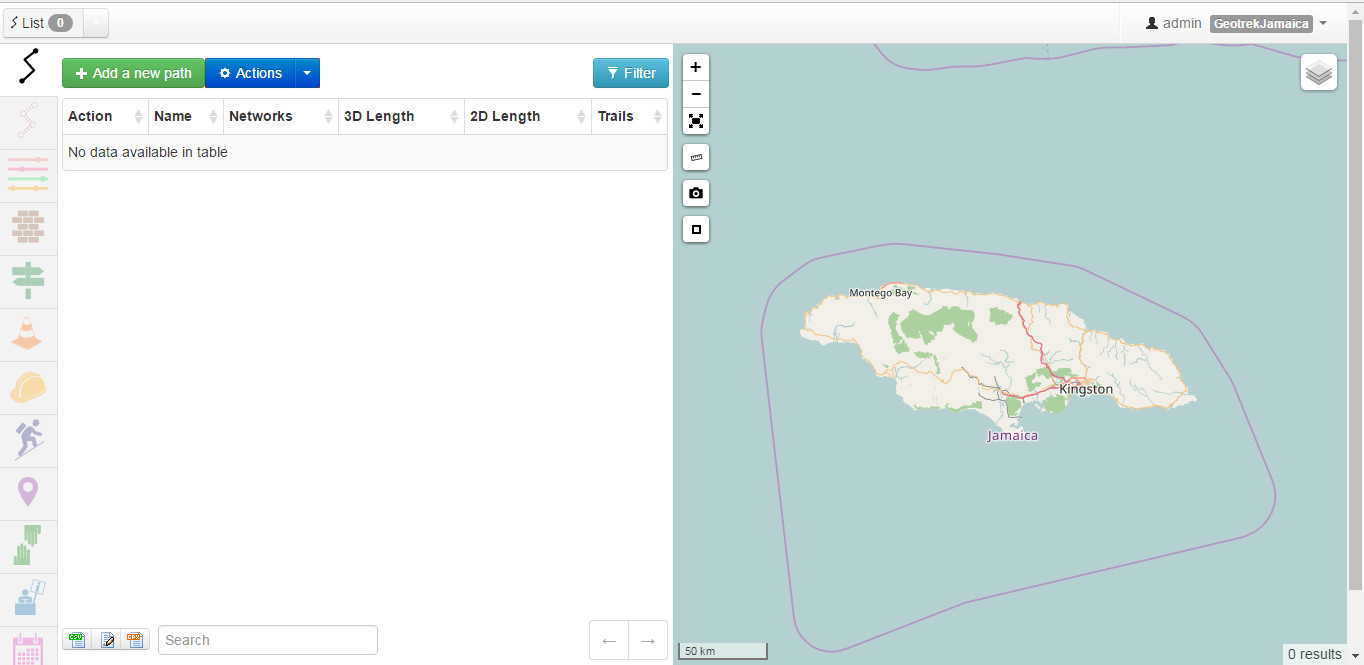
Geotrek-admin (along with its middleware and database) is now installed on the server and well running. To verify it, you can access the application with a web browser to http://yourserver/.
In case of errors, you can check the log file /home/myusername/Geotrek-admin-2.17.2/install.log.
LOAD DATA
We will now have to load data in Geotrek database (see official documentation).
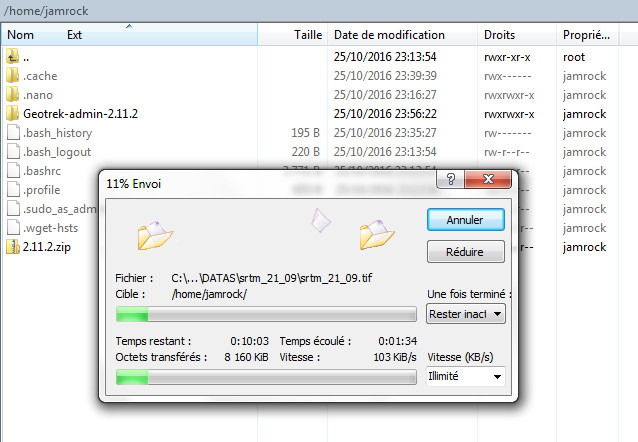
We will load the DEM file on the server with WINSCP (srtm_21_09.tif + srtm_21_09.tfw in our case)
Copy the files on the server:
Load the DEM into Geotrek database
sudo apt-get install postgis
bin/django loaddem /home/jamrock/srtm_21_09.tif
OPEN DATABASES CONNECTION
By default, PostgreSQL databases are only accessible by local application on server.
But it can be useful to open database connection, if you want to manage your database and data with pgAdmin or to access to it with QGIS.
Be careful as this is not a good point on security aspect and it should be limited to a few IP adresses.
Edit PostgreSQL global configuration file
sudo nano /etc/postgresql/9.5/main/postgresql.conf
Uncomment listen_addresses = '*' line
Edit PostgreSQL client authentification configuration file
sudo nano /etc/postgresql/9.5/main/pg_hba.conf
Add this line at the end of the file to open access to database to all IP adresses (not recommended)
host all all 0.0.0.0/0 md5
Restart PostgreSQL to activate modifications
sudo /etc/init.d/postgresql restart
LOAD MINIMAL DATA
See official documentation.
As explained in the documentation, you can choose to include basic data.
make load_data
Create an application superuser
bin/django createsuperuser
You can now log on to your Geotrek-admin with your web browser at http://yourserver
We will now include GIS data such as districts (parish) and first paths.
We will do that with QGIS (See French article about importing paths into Geotrek database).
Launch QGIS Desktop and connect Geotrek database.

Set the connexion
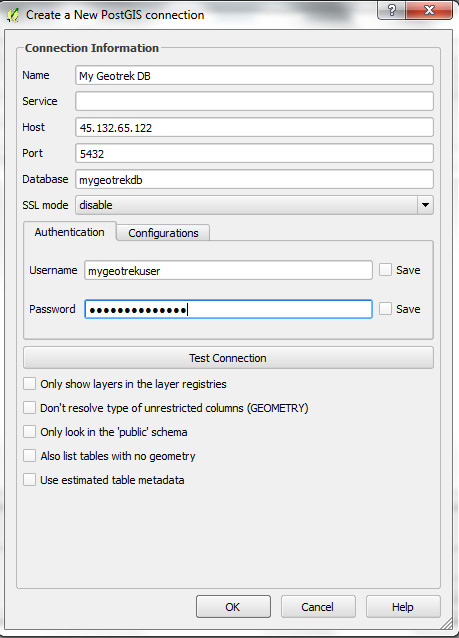
Connect the database to list geometric tables.
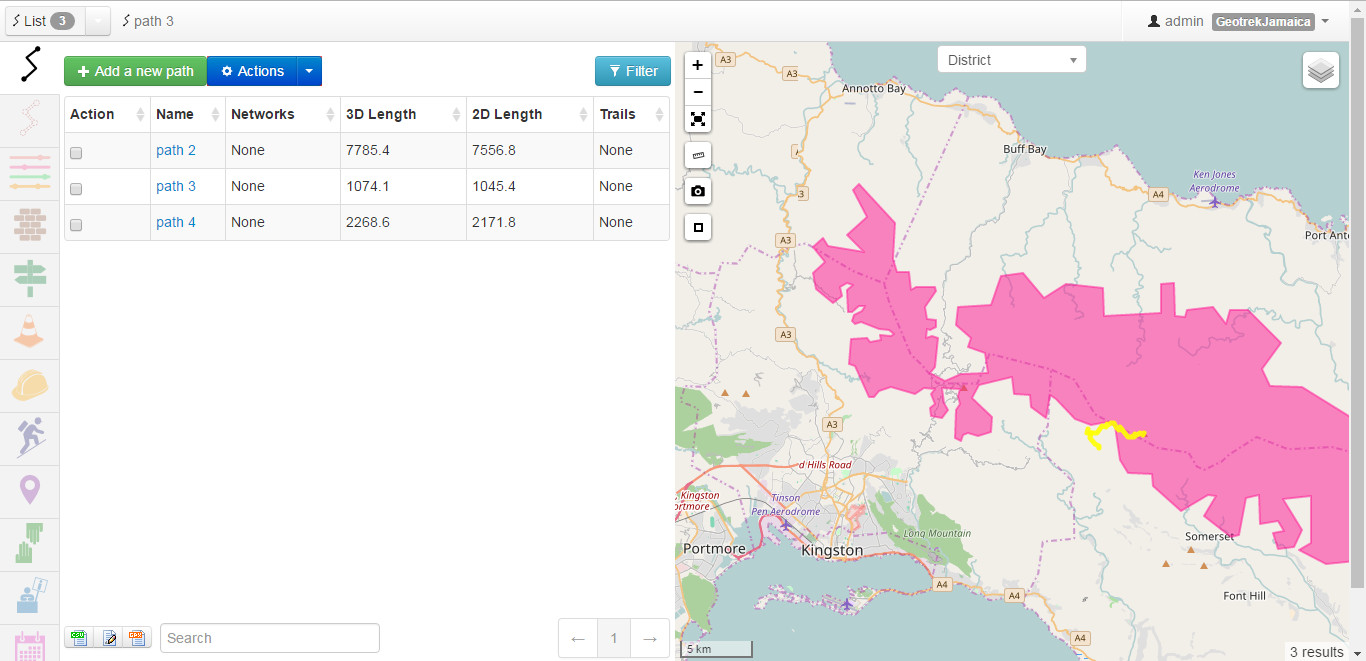
You can open path table (geotrek.l_t_troncon), cities table (zonage.l_communes), districts (zonage.l_secteurs) and protected areas (zonage.l_zonage_reglementaire).
You can copy/paste data from your SIG layers (OSM data in our case) into these Geotrek tables.
Select your data source layer, then select the objects that you want to import into Geotrek table.
In our example, we selected some paths into highway layer from OSM.
Then we copied them (EDIT / COPY FEATURES), then select the Geotrek table (l_t_troncon in our case), TOGGLE EDITING and then copied the data (EDIT / PASTE FEATURES).
Before saving to import the copied features, you may have to add some attributes details about the features. Open the attributes of the Geotrek table and fill some columns for selected features.
For l_t_troncons, you have to fill the structure number and can also fill the validation status and the external_id (OSM ID in our case just to keep the information about the data source).
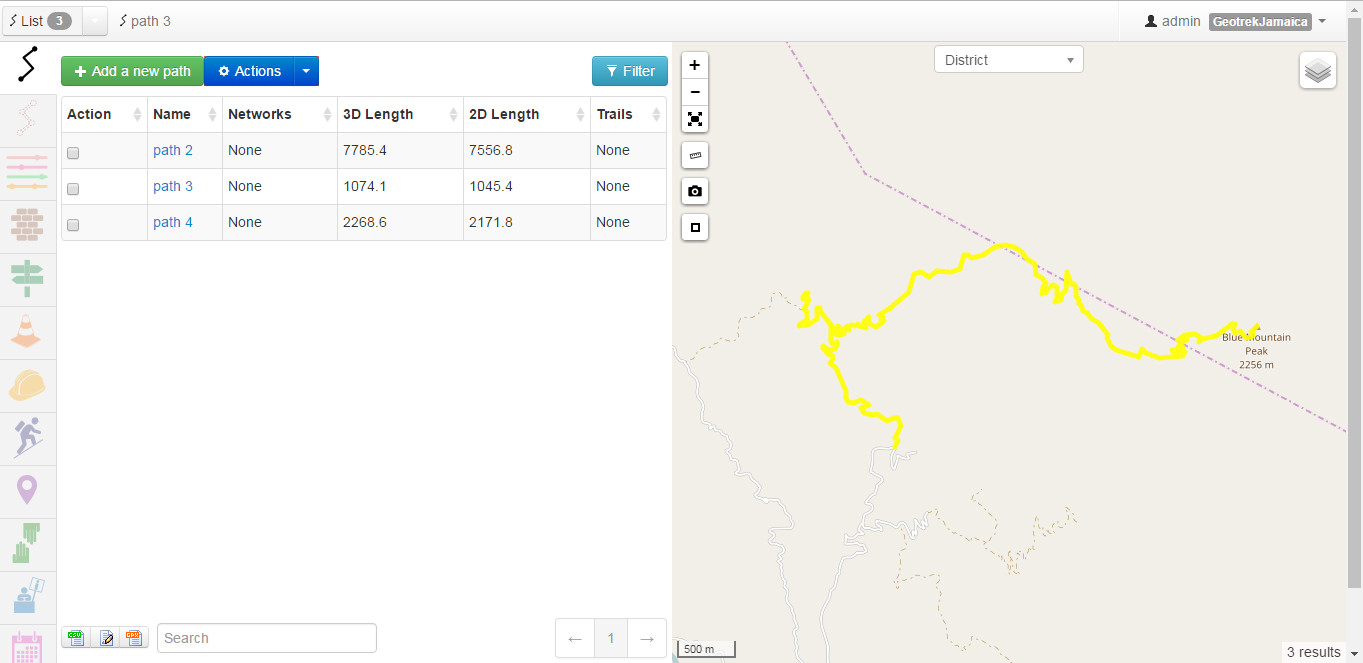
When saving, the data will be imported into Geotrek.
Now if you refresh Geotrek-admin in your browser, you will see the imported data.
You can do the same to copy/paste zoning such as national parks...
But you can also use QGIS to edit or create features directly in Geotrek database as we did to add a national park.
Select a Geotrek table / TOGGLE EDITING and then ADD FEATURE.
Draw the feature.

Then fill the feature attributes. In our case, the name of the zoning and its type.

Save changes.
Zoning types can be edited directly in the database or in Geotrek Adminsite.
Adminsite is where you can manage users and all types of contents.

Go to Zoning / Restricted area types to edit, delete or add some zoning types.

We decided to import paths from OSM, but you could also choose to create them directly in Geotrek-admin in the PATH module.
It does very well for snapping and splitting with existing paths.
See French user manual for additional details.
PATH SNAPPING:
OK so now we have our Geotrek-admin running, we imported some data (DEM, districts, national parks and paths), we can start to create some content.
Geotrek-admin features some modules to manage treks (paths, status, infrastructures, signages and interventions).
It is also the administration of the public portal to publish and promote treks and points of interest (nature, landscape, points of views, history…).
Every objects that you will that will be added to Geotrek modules (except touristic contents and events) are relative to path.
That’s why you need to include paths before being able to create signages, interventions, treks, points of interest...).
And that's also why it is important to start with integrating quality paths into Geotrek database before working on other objects.
INTERVENTION FORM:
We will create a new trek.
Fil the form.
Create the trek using existing paths with ROUTE tool by locating start and end points of the trek.
It will draw the trek using the shortest route between start and end points.

You can add some intermediary points if you don’t want to use the shortest route or to do round-trips or loops.
See also Trek creation video (in French).
You can also attach photos and files to each objects.
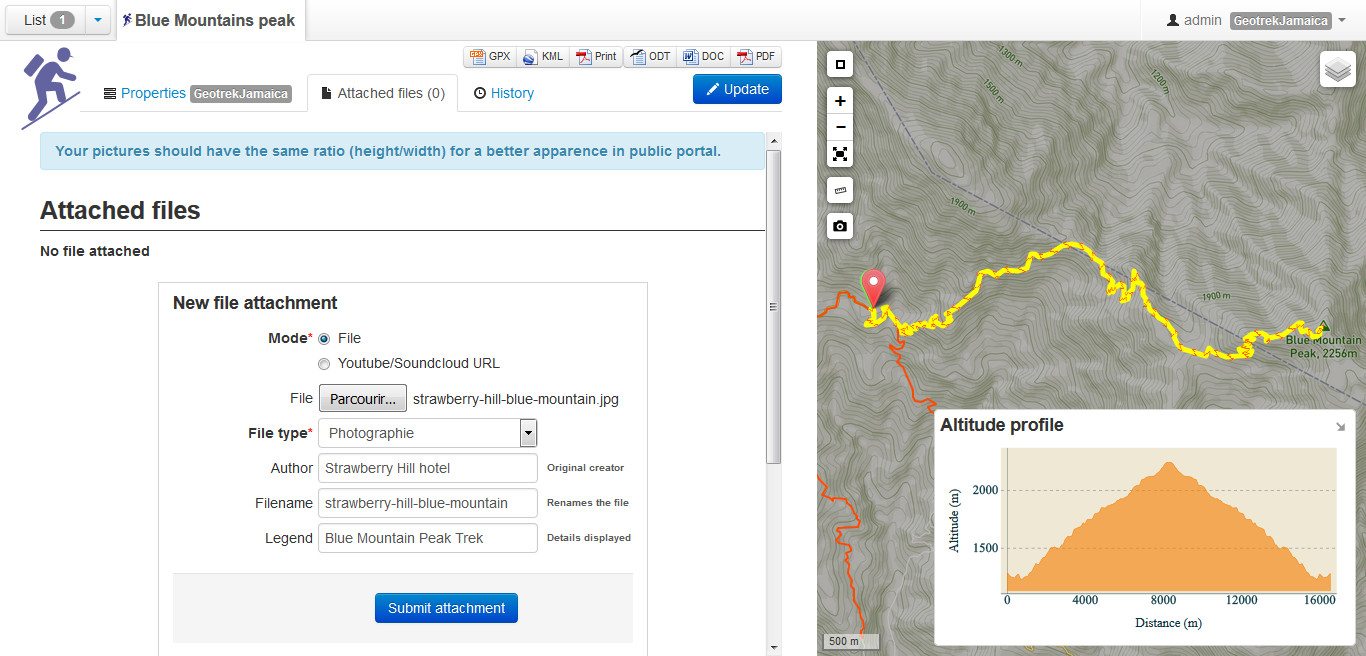
Star one photo for each trek and POI to use them as thumbnail of the object in Geotrek-rando and Geotrek-mobile.
SYNCHRONIZE DATA
Once you have created data to publish, you have to synchronize them to generate files for Geotrek-rando and Geotrek-mobile (treks.geojson, PDF, GPX, KML…).
You can do that from Geotrek-admin interface.
See official documentation.

Or you can synchronize data with command lines that allow to include some options or with a cron task to automatize it each night as an example.
./bin/django sync_rando -v2 /home/MYUSERNAME/data-jam/
URL
By default Geotrek-admin will be accessible with your web browser at the root of your server : http://yourserver
If you want to set another domain, you have to edit the default NGINX configuration created during Geotrek-admin automatic installation.
cd /etc/nginx/sites-available/
sudo nano geotrek
Add the server_name
server {

				listen 80  default ;

				server_name admin.jamaica.com;
Restart NGINX
sudo service nginx restart
E. GEOTREK-RANDO
Installation. See documentation.
Go in your linux user folder
cd /home/MYUSERNAME/
Installing NodeJS
curl -sL https://deb.nodesource.com/setup_6.x | sudo -E bash -
sudo apt-get install nodejs build-essential
Installing Geotrek-rando
wget https://github.com/GeotrekCE/Geotrek-rando/archive/2.14.10.zip (number to replace with latest stable version)
unzip 2.14.10.zip
Rename Geotrek-rando folder
cd Geotrek-rando

			npm install

			npm run dist
CONFIGURATION
See documentation.
Edit custom/settings.custom.json file
See documentation for minimal and optional settings.
Example of configuration for hike-jamaica.com:
{
	"PLATFORM_ID": "geotrek-rando-JAM",
	"API_URL": "http://www.hike-jamaica.com/datas-jam",
	"BACKOFFICE_URL": "http://url",
	"ENABLE_HTML_MODE": true,
	"LOGO_FILE": "logo-hike-jamaica.png",
	"FAVICON":{
		"png":"favicon.png"
	},
	"DEFAULT_LANGUAGE": "en",
	"ENABLED_LANGUAGES": ["fr", "en"],
	"SHOW_HOME": false,
	"DEFAULT_ACTIVE_CATEGORIES": ["T","C1"],
	"PERMANENT_TILELAYERS":[
		{
		"LAYER_URL": "https://api.mapbox.com/v4/mapbox.outdoors/{z}/{x}/{y}.png?access_token=XXXXXXXXXXXXXXXXXXXXXXXXXXXXX",
		"OPTIONS": {
			"attribution": "(c) MapBox"
			}
		}
	],
	"ORTHOPHOTO_TILELAYERS_NAME": "Photo",
	"ORTHOPHOTO_TILELAYERS": {
		"LAYER_URL": "https://api.mapbox.com/v4/mapbox.satellite/{z}/{x}/{y}.png?access_token=XXXXXXXXXXXXXXXXXXXXXXXXXXX",
			"OPTIONS": {
			"id": "satellite",
			"attribution": "(c) MapBox"
			}
		},
	"TREKS_TO_GEOJSON_ZOOM_LEVEL":10,
	"NEAR_ELEMENTS_CATEGORIES": false,
	"LEAFLET_CONF": {
		"CENTER_LATITUDE": 18,
		"CENTER_LONGITUDE": -77.4,
		"DEFAULT_ZOOM": 8,
		"DEFAULT_MIN_ZOOM": 4,
		"DEFAULT_MAX_ZOOM": 17
	},
	"GOOGLE_ANALYTICS_ID":"UA-XXXXXXXXXXX",
	"FILTERS_DEFAULT_OPEN": true,
	"FILTER_BY_VIEWPORT_DEFAULT": true,
	"DISPLAY_ASIDES_COUNTERS": true,
	"POI_EXPANDED": true,
	"SHOW_ARROWS_ON_ROUTE": true,
	"ENABLE_STRUCTURE_FILTERING": false
}
HTTP server
If you installed Geotrek-rando on the same server as Geotrek-admin, NGINX is already installed.
Otherwise you have to start with installing it.
sudo apt-get install nginx
Then you have to configure it.
See documentation.
Create a configuration file for your Geotrek-rando
sudo nano /etc/nginx/sites-available/geotrek-rando
Here is the content our geotrek-rando configuration file. It was done for a version 2.14.10 of Geotrek-rando and has to be updated for newer versions, using official documentation.
server {
	listen 80;
	server_name hike-jamaica.com;
	root /home/MYUSERNAME/Geotrek-rando/public;
	if_modified_since before;
	expires 1h;
	gzip on;
	gzip_types text/text text/html text/plain text/xml text/css application/x-javascript application/javascript application/json;
	include mime.types;
	types {
		application/json geojson;
		application/gpx+xml gpx;
		application/vnd.google-earth.kmz kmz;
		application/x-font-ttf ttf;
	}
	location /data-jam/ {
		root /home/MYUSERNAME/;
	}
	location / {
		try_files $uri $uri/ /index.html;
	}
}
Enable the Geotrek-rando configuration
sudo ln -s /etc/nginx/sites-available/geotrek-rando /etc/nginx/sites-enabled/geotrek-rando
Restart NGINX
sudo service nginx restart
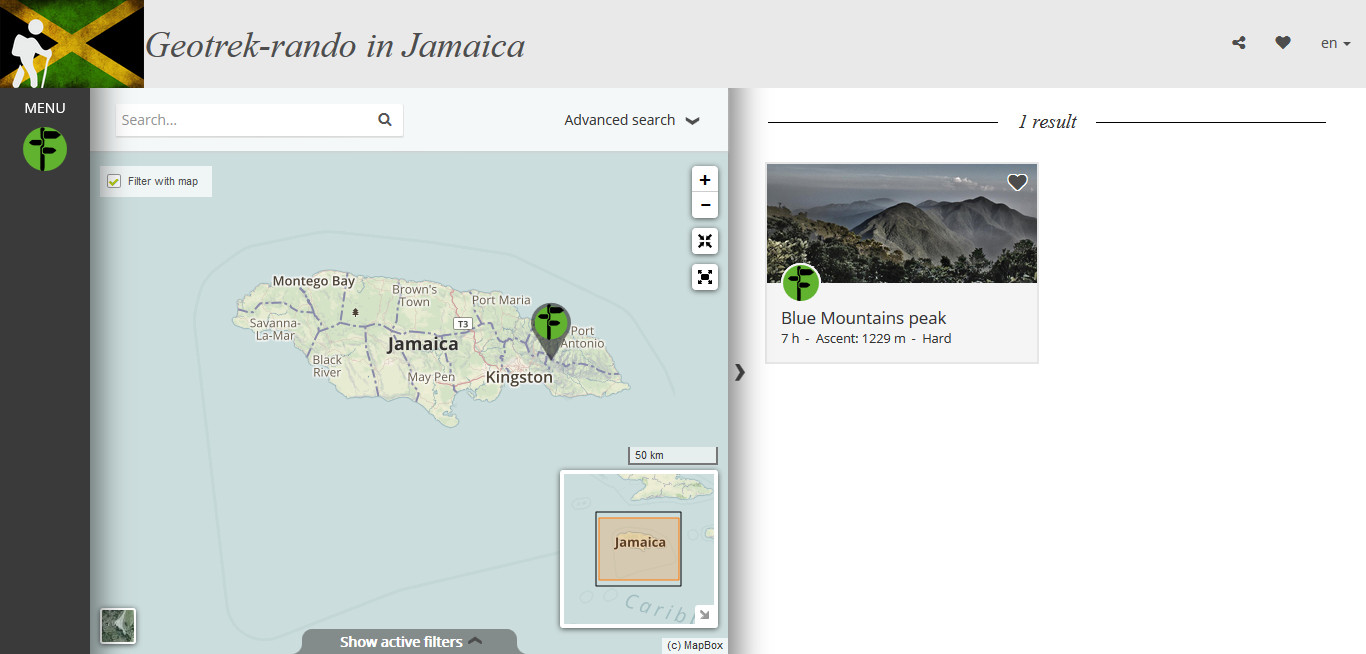
Your Geotrek-rando portal should work now and you can access to it with your web browser, as this one http://www.hike-jamaica.com.
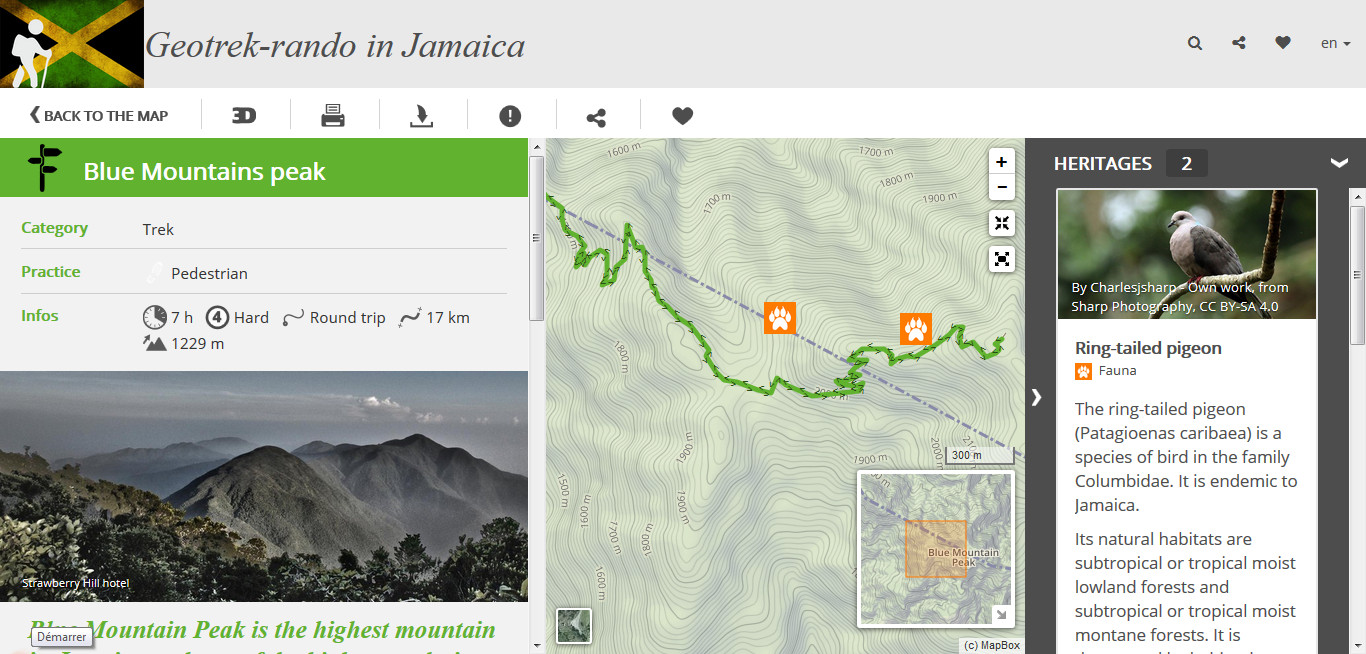
TO GO FURTHER...
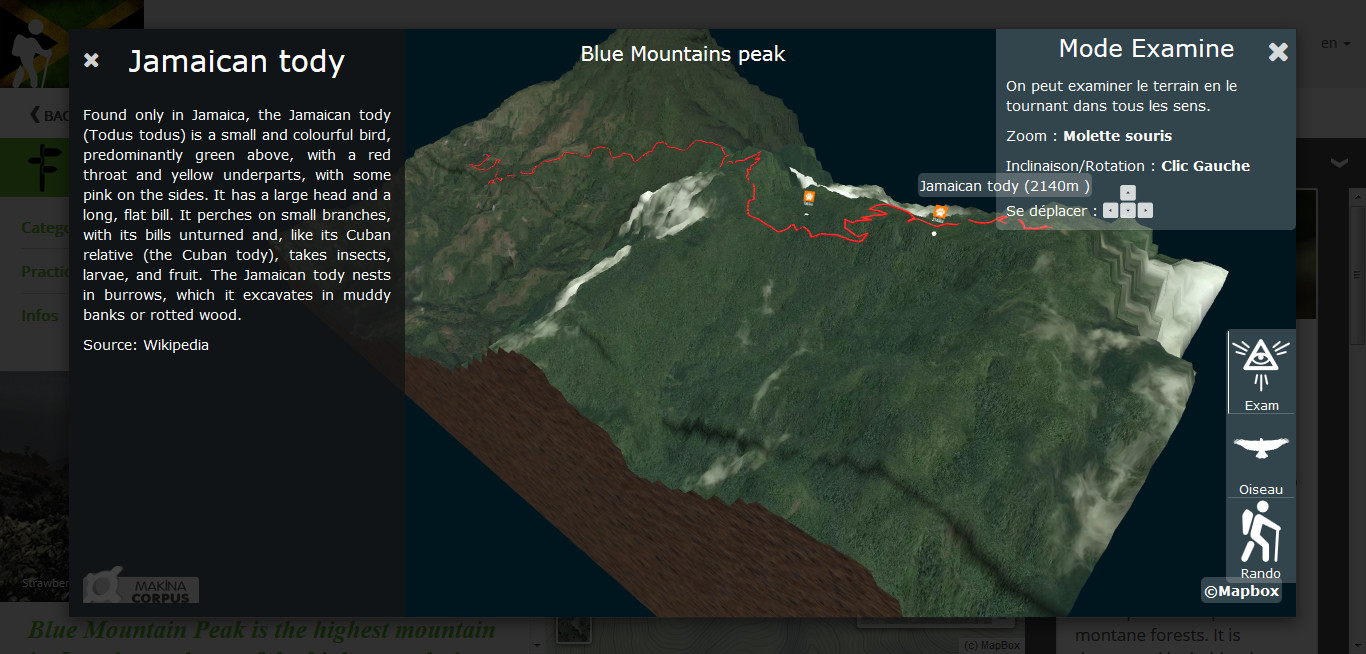
You can now continue to create some content for Geotrek-rando (homepage, static pages, treks, POIs, touristic content and event and services).

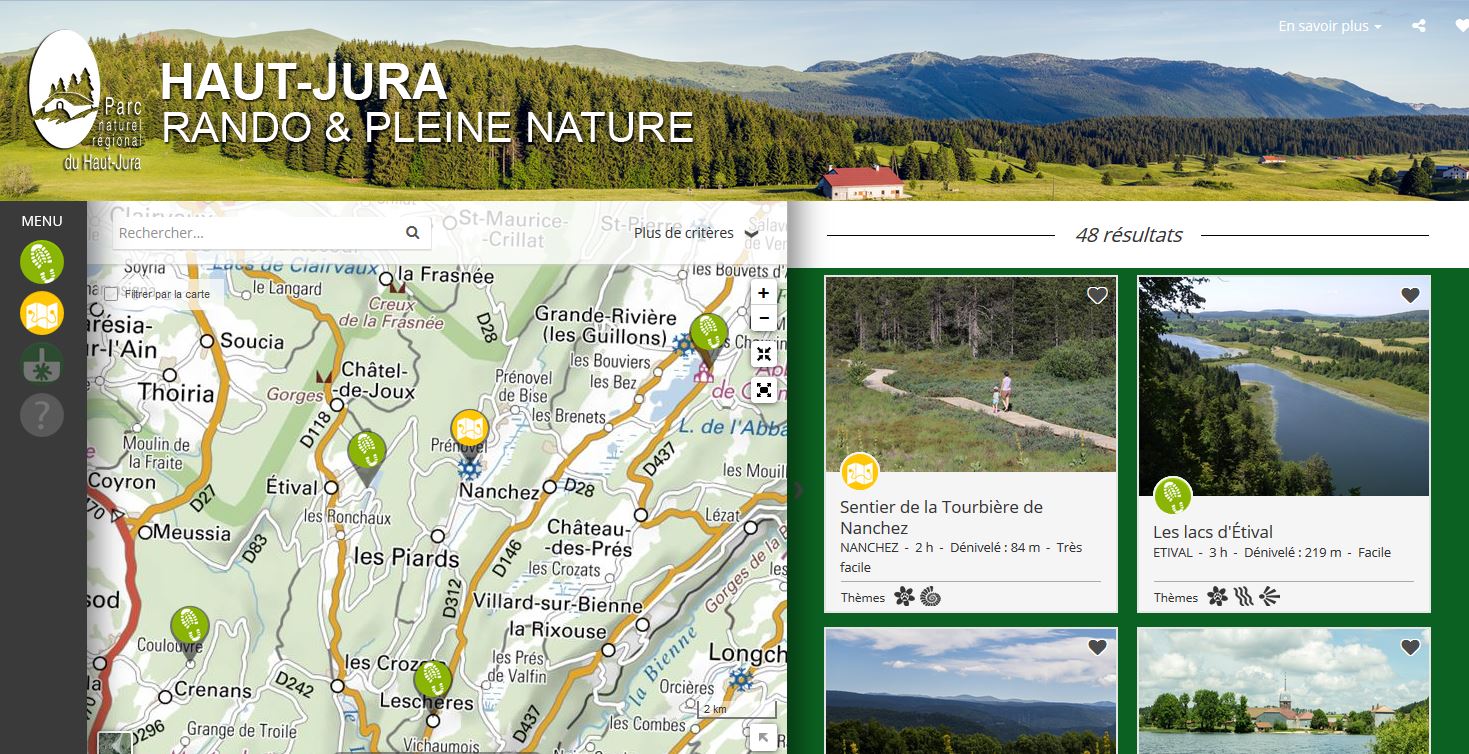
A few other Geotrek-rando examples :
- Grand tour des Ecrins
- Vercors Rando
- Haut-Jura Rando
- Rando Alpes de Haute-Provence
- Rando Tec Tec
- Rando Amazonie
- Rando Guadeloupe
- Destination Cevennes
- Tourisme Normandie-Maine
- Rando Vosges du Nord
- Rando Marittime Mercantour
- Rando Vanoise
You can also continue the configuration with:
- many additional settings
- the possibility to override the default CSS
- changing some words in the application
- and creating your homepage, header…
You can use Geotrek-admin to manage signage, infrastructures and interventions.
You can also create an Android and iOS mobile application, unclude the same data, using GPS location and working online or offline. See Geotrek-mobile.
